Why You’ll Love This Recipe
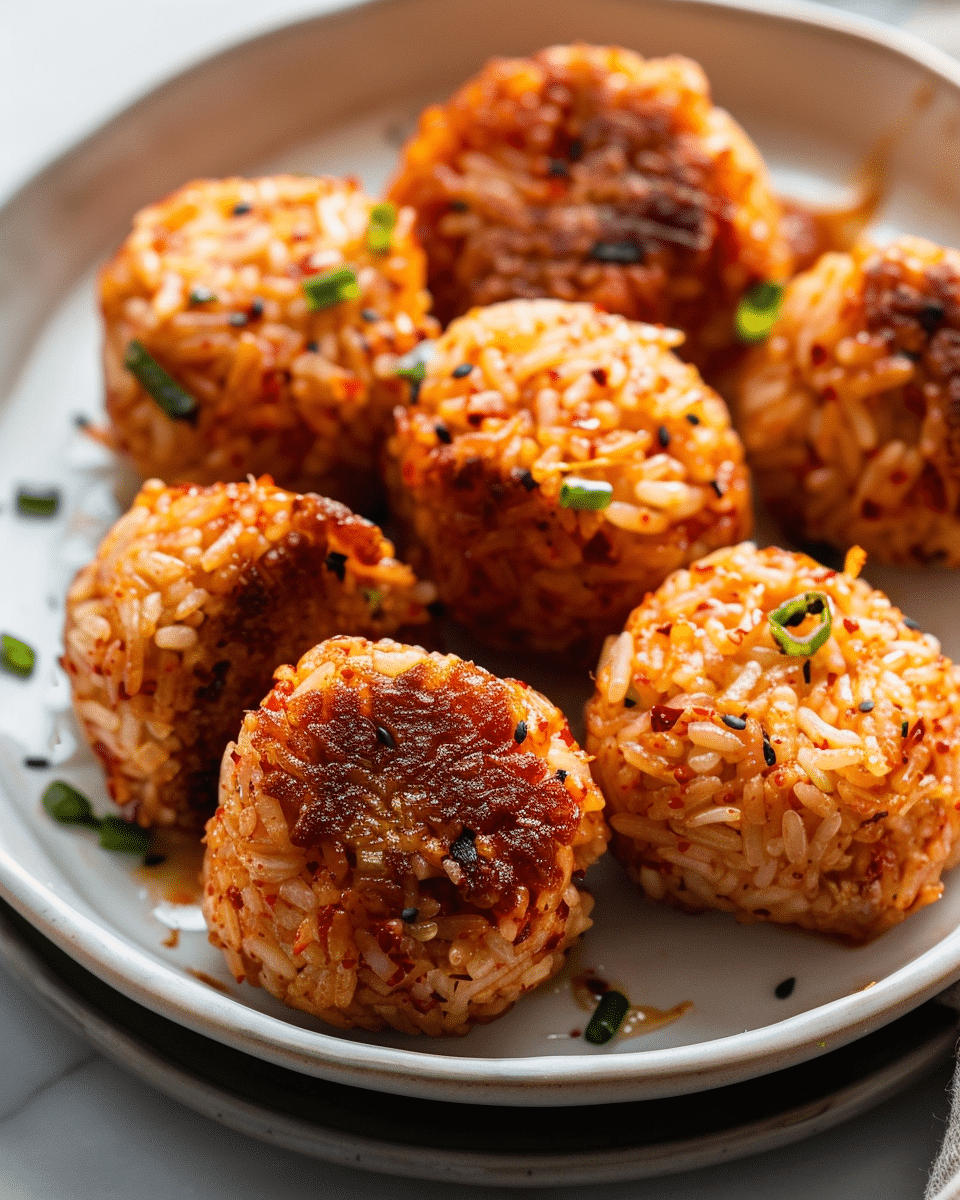
I like this recipe because it’s fun, comforting, and full of bold flavors. The kimchi adds just the right amount of spice and tang, while the cheese gives that satisfying melt. I also enjoy how versatile they are—I can fry them, air fry them, or even bake them, depending on my mood. They’re a great crowd-pleaser for parties or just a cozy night snack.
Ingredients
(Note: All ingredient amounts are listed in the recipe card below.)
Cooked short-grain rice: 3 cups, cooled
Kimchi, finely chopped and squeezed dry: 1 cup
Mozzarella or cheddar cheese, cut into 1.5 cm cubes: 1 cup
Sesame oil: 2 teaspoons
Soy sauce: 1 tablespoon
Fine salt: 1/2 teaspoon
Ground black pepper: 1/4 teaspoon
All-purpose flour: 1/2 cup
Large eggs, beaten: 2
Panko breadcrumbs: 1 cup
Vegetable oil, for frying: enough to reach 2.5 cm depth in pan
Toasted sesame seeds: 1 tablespoon, for garnish
Green onions, thinly sliced: 2 tablespoons, for garnish
Directions
-
I mix the cooled rice, chopped kimchi, sesame oil, soy sauce, salt, and black pepper in a large bowl until evenly combined.
-
I cut the cheese into cubes and chill them in the freezer for 5 minutes so they hold their shape better.
-
With damp hands, I scoop about 2 tablespoons of the rice mixture, flatten it, place a cheese cube in the center, then seal and roll it into a tight ball. I repeat this with the rest and set them on a parchment-lined tray.
-
I roll each ball in flour, dip it in beaten egg, then coat it with panko breadcrumbs, pressing gently so the crumbs stick.
-
In a skillet, I heat about 2.5 cm of vegetable oil over medium heat to 175°C (a breadcrumb should sizzle and turn golden in about 2 seconds).
-
I fry the balls in batches for 3–4 minutes, turning to brown all sides until they’re crisp and golden. I avoid overcrowding the pan.
-
I transfer them to a paper towel–lined plate, then garnish with toasted sesame seeds and green onions.
-
I serve them hot while the centers are still melty, often with spicy mayo or a soy-based dipping sauce.
Servings and Timing
This recipe makes about 18 rice balls, or around 6 servings. Total time is about 25 minutes from start to finish.
Variations
Sometimes I swap mozzarella for cheddar to change up the flavor. I’ve also added chopped cooked bacon or ham for a more savory version. For a spicier kick, I mix in gochujang with the rice. When I want a lighter option, I air fry them instead of deep frying.
Storage/Reheating
I store leftover rice balls in the refrigerator for up to 3 days. To reheat, I pop them in the air fryer at 180°C for 5 minutes or in the oven at 350°F until hot and crispy again. They can also be frozen after shaping and breading—then fried straight from frozen, just adding 1–2 extra minutes.
FAQs
Can I make these rice balls ahead of time?
Yes, I shape and bread them a day in advance, keep them covered in the fridge, and fry when ready.
Can I bake them instead of frying?
Yes, I bake at 200°C for 15–18 minutes, turning halfway, until golden.
Can I use an air fryer?
Yes, I spray them lightly with oil and air fry at 190°C for about 10 minutes, turning once.
What type of rice works best?
I prefer short-grain rice because it’s stickier and holds together better.
Can I use other cheeses?
Yes, cheddar, gouda, or even pepper jack all work well.
How do I keep the balls from falling apart?
I make sure the kimchi is well drained and the rice is cooled before shaping.
Can I make them spicier?
Yes, I like adding gochujang or chili flakes to the rice mixture.
Do they still taste good after reheating?
Yes, but they’re best eaten fresh when the cheese is perfectly melty.
Can I make them smaller for bite-sized snacks?
Yes, I just use 1 tablespoon of rice mixture instead of 2.
What dipping sauce goes best with these?
I like spicy mayo, soy sauce with sesame oil, or even a sweet chili sauce.
Conclusion
These kimchi cheese rice balls are one of my favorite snacks because they’re crispy, melty, and full of bold flavor. I love how easy they are to make and how well they adapt to frying, baking, or air frying. Whether I serve them as a party appetizer or a cozy treat, they never last long on the table.
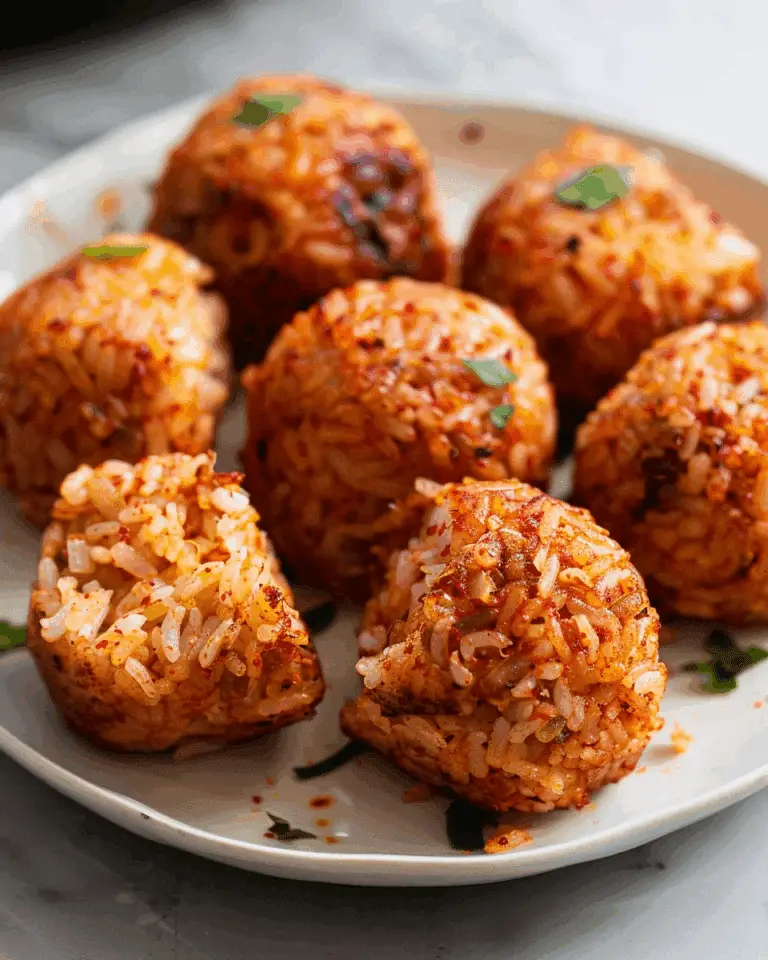
Kimchi Cheese Rice Balls
5 Stars 4 Stars 3 Stars 2 Stars 1 Star
No reviews
These kimchi cheese rice balls are crispy, golden bites with a gooey cheese center and tangy kimchi mixed into the rice. Perfect as a Korean-inspired snack or appetizer that’s crunchy on the outside and creamy inside.
- Total Time: 25 minutes
- Yield: 18 rice balls (6 servings)
Ingredients
3 cups cooked short-grain rice, cooled
1 cup kimchi, finely chopped and squeezed dry
1 cup mozzarella or cheddar cheese, cut into 1.5 cm cubes
2 teaspoons sesame oil
1 tablespoon soy sauce
1/2 teaspoon fine salt
1/4 teaspoon ground black pepper
1/2 cup all-purpose flour
2 large eggs, beaten
1 cup panko breadcrumbs
Vegetable oil, for frying (about 2.5 cm deep in skillet)
1 tablespoon toasted sesame seeds, for garnish
2 tablespoons green onions, thinly sliced, for garnish
Instructions
- Mix cooled rice, chopped kimchi, sesame oil, soy sauce, salt, and pepper in a large bowl until evenly combined.
- Cut cheese into cubes and chill in the freezer for 5 minutes to firm.
- With damp hands, scoop about 2 tablespoons of rice mixture, flatten, place a cheese cube in the center, then seal and roll into a tight ball. Repeat with remaining mixture.
- Roll each ball in flour, dip in beaten egg, and coat with panko breadcrumbs, pressing gently to stick.
- Heat about 2.5 cm of oil in a skillet over medium heat (175°C/350°F). Test with a breadcrumb—it should sizzle and brown in 2 seconds.
- Fry rice balls in batches for 3–4 minutes, turning to brown evenly. Avoid overcrowding the pan.
- Transfer to a paper towel–lined plate. Garnish with sesame seeds and green onions.
- Serve hot with spicy mayo, soy dipping sauce, or sweet chili sauce.
Notes
Swap mozzarella for cheddar, gouda, or pepper jack for a different flavor.
Add gochujang for a spicier version.
Bake at 200°C for 15–18 minutes or air fry at 190°C for 10 minutes for a lighter option.
Shape and bread ahead of time, refrigerate overnight, and fry fresh.
Freeze after breading and fry from frozen, adding 1–2 extra minutes.
- Author: Chloe Mae
- Prep Time: 15 minutes
- Cook Time: 10 minutes
- Category: Appetizer, Snack
- Method: Fried
- Cuisine: Korean
- Diet: Halal
Nutrition
- Serving Size: 3 rice balls
- Calories: 290
- Sugar: 2g
- Sodium: 560mg
- Fat: 14g
- Saturated Fat: 6g
- Unsaturated Fat: 7g
- Trans Fat: 0g
- Carbohydrates: 32g
- Fiber: 2g
- Protein: 9g
- Cholesterol: 70mg

